Photography and Editing Tips
How to HDR photoshoot for real estate photography?
Oct
High Dynamic Range has become the trend in real estate photography with its ability to showcase all details captured in an image. By blending multiple exposures shot at different light condition, HDR photography result in a stunning image with details, vibrant color and a wide range tone.
So how to shoot your HDR photo correctly?
Why you need to shoot HDR instead of single exposure?
For real estate photography it is important to capture all the detail of the interior and exterior. HDR photography is a method used to archive all the details and colors by shooting multiple exposure levels for 1 image and blend them together for a full dynamic range image.
With the combination of multiple exposures in a bracket when process the editing steps, it is easily to archive these advantages:
- Accurate details
- Reflection managing
- Noise and bad shadow removing
- Color cast correction
Those advantages are hard to archive with just a single exposure.
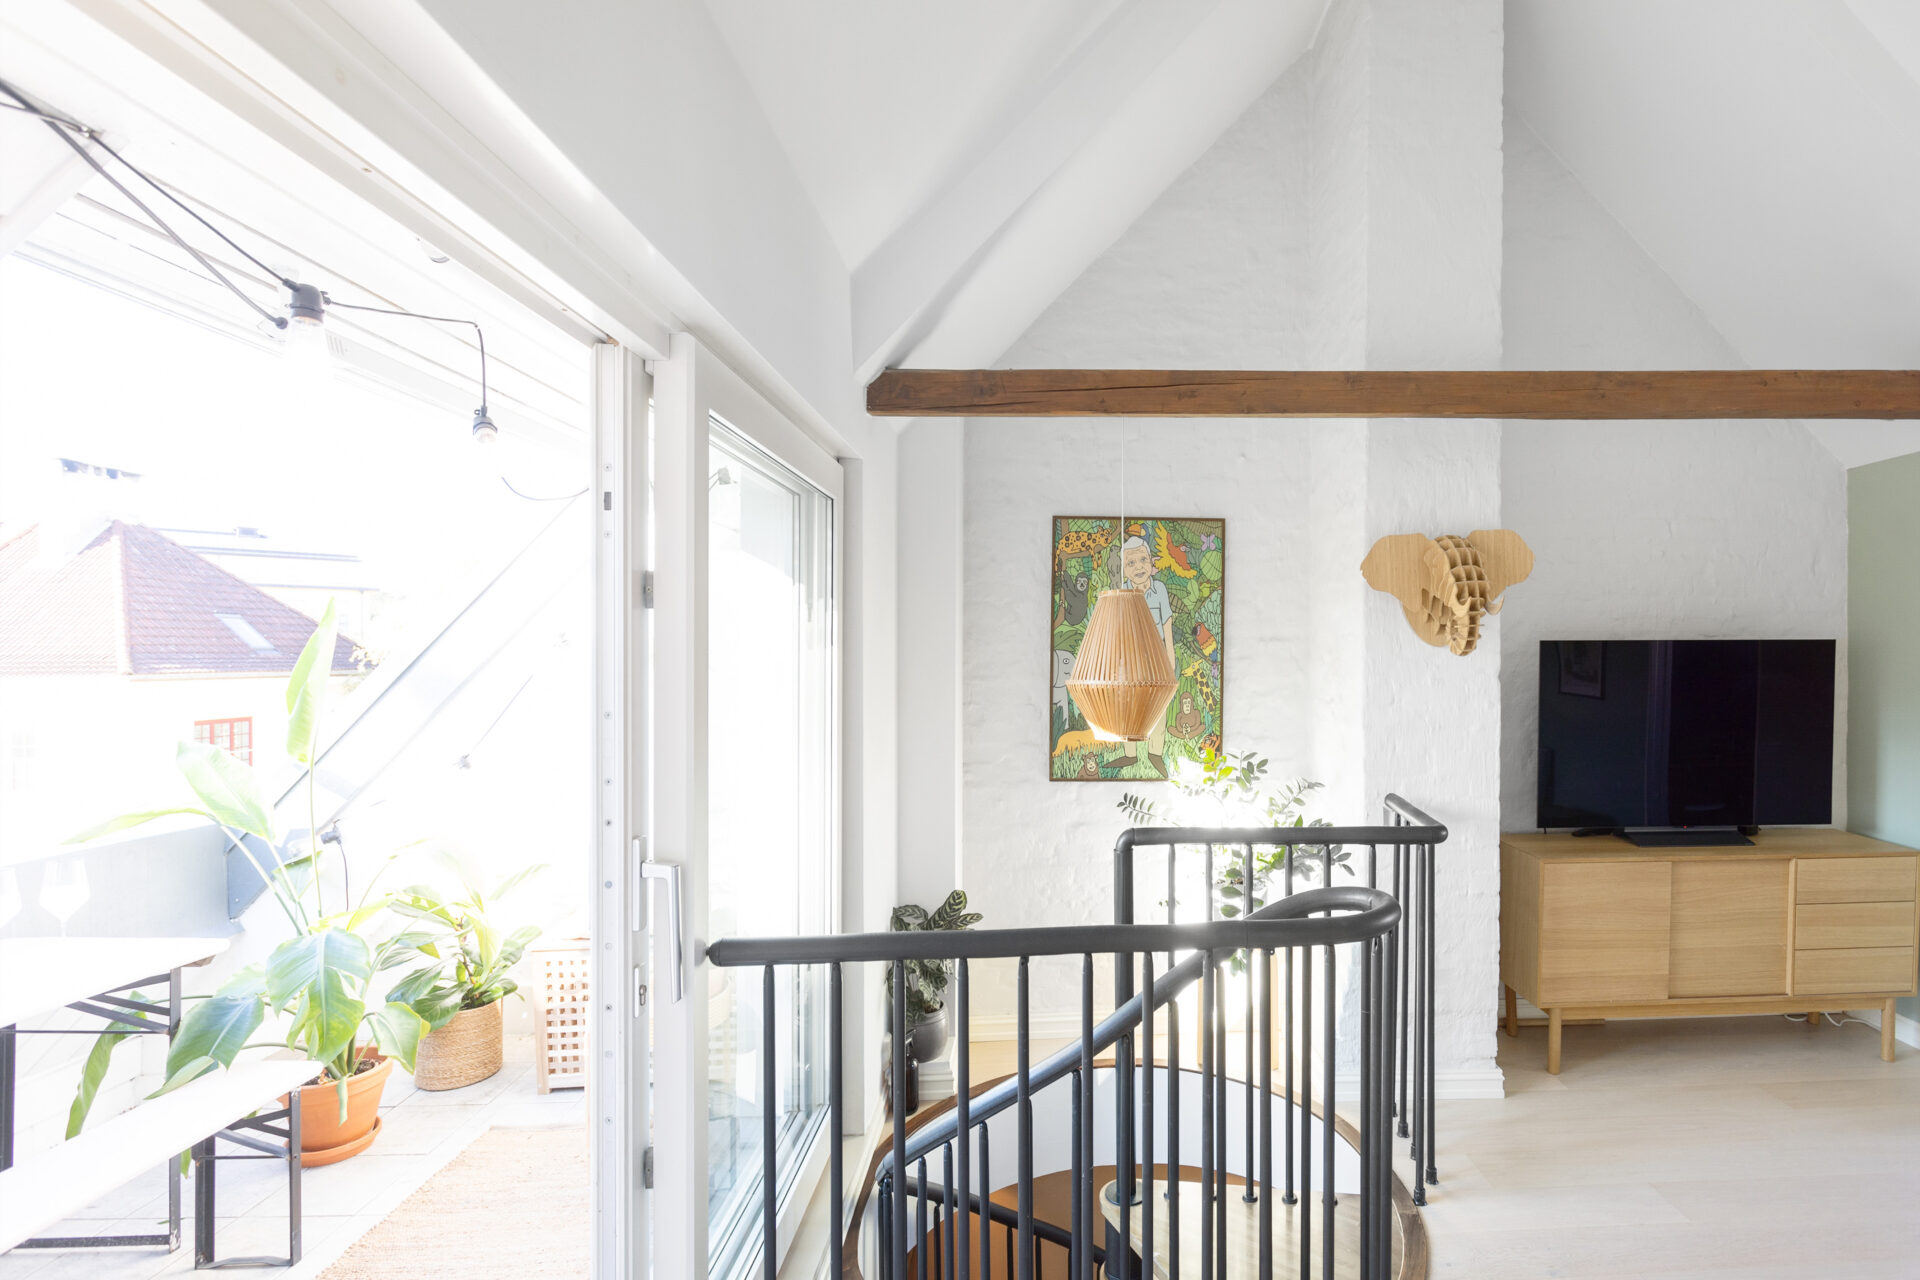
Single exposure editing

HDR exposure editing
As you can see, the detail in the HDR image has been recovered correctly, especially the detail in the balcony view.
Overall image color has been corrected, you can see it clearly in the painting as well as the wooden floor and objects. HDR image also have less noise than the single exposure.
Look at the TV screen, you can see that the reflection has been reduced, give the photo a professional look.
How to set up a HDR photoshoot?
To archive the High Dynamic Range, we shoot the frame at multiple exposure levels (EV) to capture all the details in the brightest area to the darkest area.
Firstly, you need a DSLR or a mirrorless camera. Most of them have the ‘Automatic Exposure Bracketing‘ (AEB) feature. With this feature you can take multiple exposures when pressing the shutter button once.
If your camera doesn’t have the AEB feature you can still take the HDR photo manually by adjusting the shutter speed for each shot.
The next thing to have is a tripod and a remote control to stabilize and avoid camera movement when taking the shot. Even with the slightest movement would resulted in unaligned brackets.
Camera lens is also an essential. To capture all or most of the room, a wide-angle lens is what you go to. The ideal focal length for a lens would be approximate 12mm to 24mm. But there would be some drawback as the lens could make the image straight lines bent and distorted, some pink/green fringing along the edges could appear as well.
How to take a HDR photoshoot
With AEB function
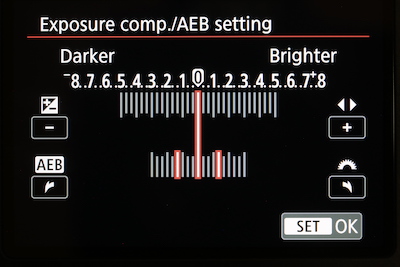
For camera that have the AEB function built in, you just need to set the AEB shooting. Each camera will have different menu option but they all have the similar procedure.
Basically, you would go to the menu and find Expo. comp./AEB option and set up the Exposure compensation amount. it is the Exposure level of images in the bracket. The AEB setup could be: “-1 / 0 /+1 / +2 / +3/” or “1-/+”; “1,3-/+” depend on the light condition when you take the shoot. But please be advised making the EV level step between exposure to short will make the HDR less effective, and too long will make it impossible to do the tone-mapping.
Then you can choose the Single or Continuous shooting mode. With the single shooting mode you would need to press the shutter button each time for each exposures. And with the continuous mode, the bracket shots will be taken continuously with one button press,
For manual HDR shot
For camera that does not have AEB function or not suitable to take HDR photos.
First you need to set your camera in Manual or Aperture Priority mode with the ISO as low as you can and flash off in most case, Anti-Share and Noise Reduction turn off.
You need a tripod and remote shutter button to have a stabilize frame as mentioned.
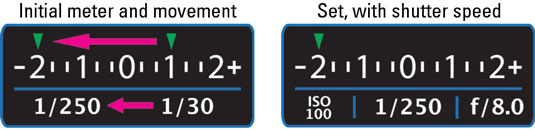
Then turn on the meter reader so that you can set up the Exposure Value (EV) for each exposure. Usually, we will take the dark exposure first then increase the exposure level for the next shoot. For example, you can shoot at the EV -2 first then increase it to -1/ 0/ 1/ 2. You would need to change the shutter speed to have the desire exposure value.
Blend a HDR photo.
So you have successfully capture some good HDR bracket all you have to do left is to blend them into one good photo. This process is called HDR blending. You can use a software for an automatic blending process but the best result will come if the blending is handled manually.
Here is basic guide on how to blend HDR images:
1/ You would need a platform to work on, the platform here is software like photoshop, Lightroom, Photomatix, Aurora,..
But software like Lightroom, Photomatix, Aurora is automatic merging, it is hard to control the detail and the outcome of the final image. The optimal solution still photoshop with manual blending
2/ Stack layers: Start with the brightest exposure first to the darkest exposure, and align them together.
3/ Masking: Use to recover the detail in burnout area by creating a black mask on the layer to get the detail of the object or area of that layer.
First is to add a mask to the layer above the brightest exposure (which is the bottom layer). This will create a black and white version of the brightest exposure, which replace the burnout area with the details captured in the dark exposure. Repeat this process with all exposures.
Then click on image and choose “Apply Images”, select layer as “Merged” and that pretty much complete the blending, next thing to do is finish edit your images with other actions such as adjust color, details, sharpen and color cast correction, retouching,…
Outsourcing editing service:
You can see that it is quite complicate to have a good HDR photo. From setting up your camera to post-production blending. finish a project from A to Z on your own would be a serious feat.
Fortunately, you can outsourcing the post-production step to save your time learning and editing your photos. Giving you the time for more projects, or yourself.
With Ursin Editing service, you can have various of services for real estate photo editing. Our editing service provide consistent quality, 12 hours turnaround time and 24/7 operation.
You can have more information and place your trial order in:


How To Branding Your Real Estate Photography Business
To standout in the neat market of real estate photography, a strong brand name is [...]
Mar

Real estate photography: HDR Image bracketing
In Real Estate Photography industry, it is not unfamiliar when it comes to the concept [...]
Nov

Floor plan – why is it important for real estate listing?
Nowadays, when looking for a properties to buy the buyer are more often to look [...]
Oct

How to HDR photoshoot for real estate photography?
High Dynamic Range has become the trend in real estate photography with its ability to [...]
Oct

How to attract potential buyers to empty or outdated properties?
For real estate photographers, it is a common thing for you to take a photo [...]
Sep

To a brighter Lunar New Year a head!
Ursin Company has capped off the Lunar year of 2020 with our Year End party [...]
Feb