Photography and Editing Tips
Real estate photography: HDR Image bracketing
In Real Estate Photography industry, it is not unfamiliar when it comes to the concept of bracketing exposure. Bracketing means shooting one frame multiple times at difference exposure value to capture full dynamic range. Then we can blend all images in the bracket to create one vibrant, high dynamic range image.
This post will discover the concept of bracketing image. And then, how to bracket your image effectively.
1/ Dynamic Range photography?
Bracketing exposure is the absolute necessary technique for HDR (High Dynamic Range) in photography. “Dynamic range” is the terminology to describe the exposure value ratio of an image, from darkest to brightest, from darkest black to brightest white. Even with the latest technology, camera nowadays only able to capture half of the dynamic range the human eyes can see.
So to improve the dynamic range as well as enhance the photo appeal, exposure bracketing is born to capture the high dynamic range photo. Depend on the light condition the exposure bracket will have different kind of exposures.
2/ Ambient exposure
The exposures was taken in natural light source. This kind of exposure bringing the benefit of having the natural light direction with soft shadow. But it comes with the disadvantages of having too much color cast and for objects that are near the light source, which often lose details when blending.
Ideally a bracket should include 3 ambient exposures: Bright – Neutral – Dark
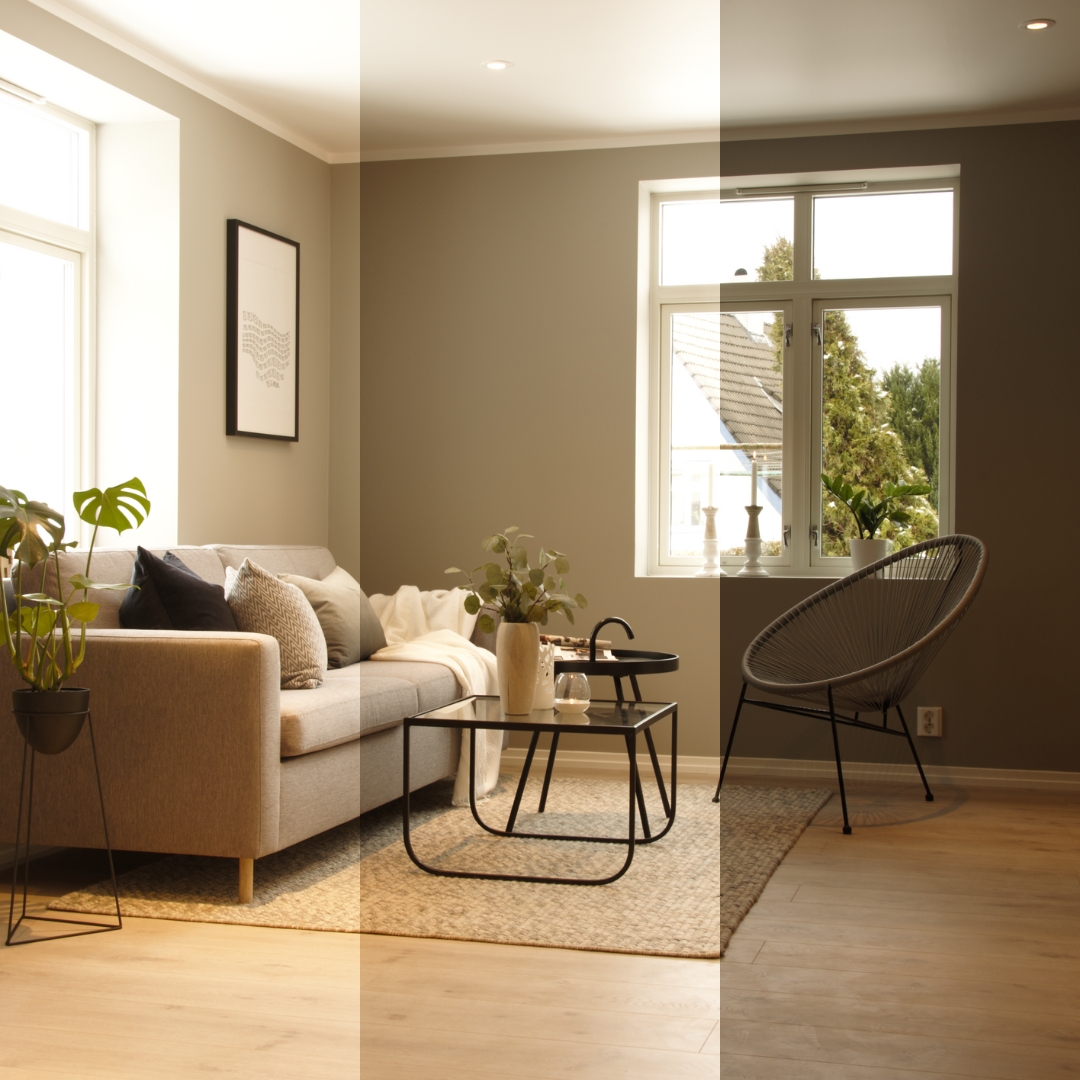
Ambient exposures
Depend on the light condition to setup the suitable Exposure value. It could be, “-1 / 0 /+1 / +2 / +3/” or “1-/+”; “1,3-/+” . However, making the EV level step between exposure to short will make the HDR less effective, and too long will make it impossible to do the tone-mapping.
2.1/ Neutral exposure
Usually the exposure value is 0, this photo aims to have a well-balance overall picture of the room. From that photo, you can assess what is missing in the image and decide to shoot at different exposure values to capture the dynamic range.
Look at the example below:
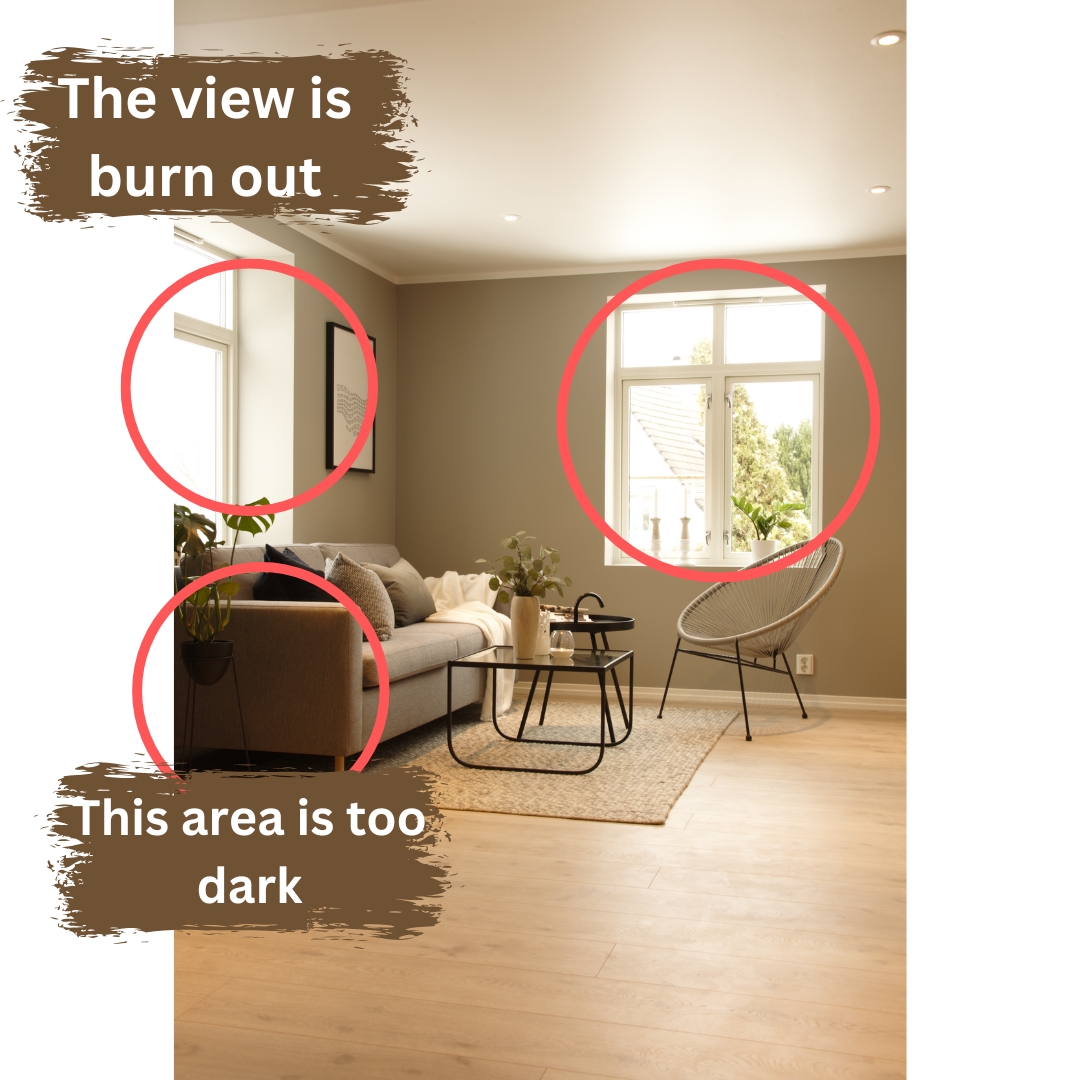
Neutral exposures
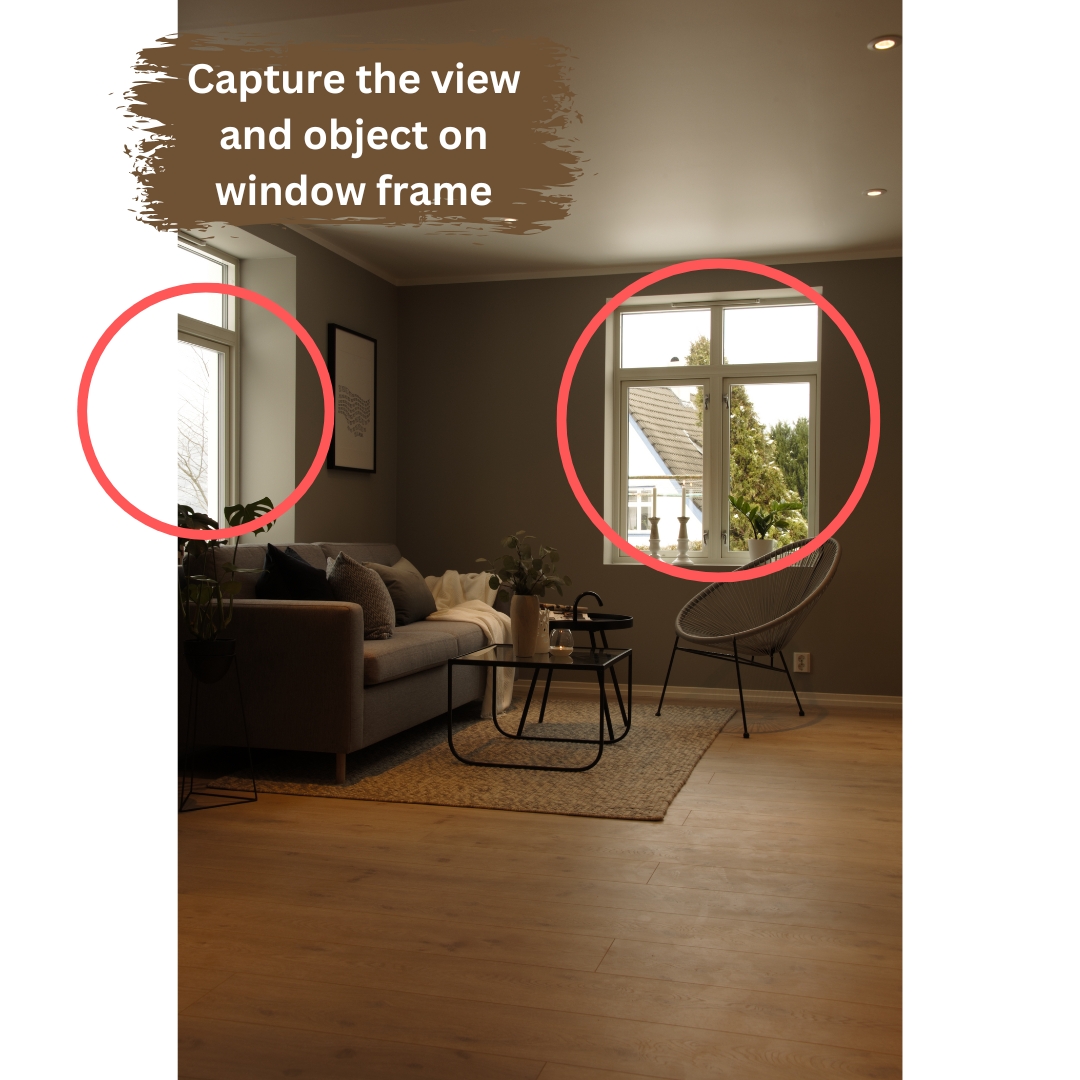
This exposure have good natural light, but the view is burned out, objects on the window frame can’t be seen clearly and some area is too dark. So how are we going to fix those issues?
2.2/ Bright exposure
First we need to retrieve the detail in the dark area by taking another image with a higher exposure value.
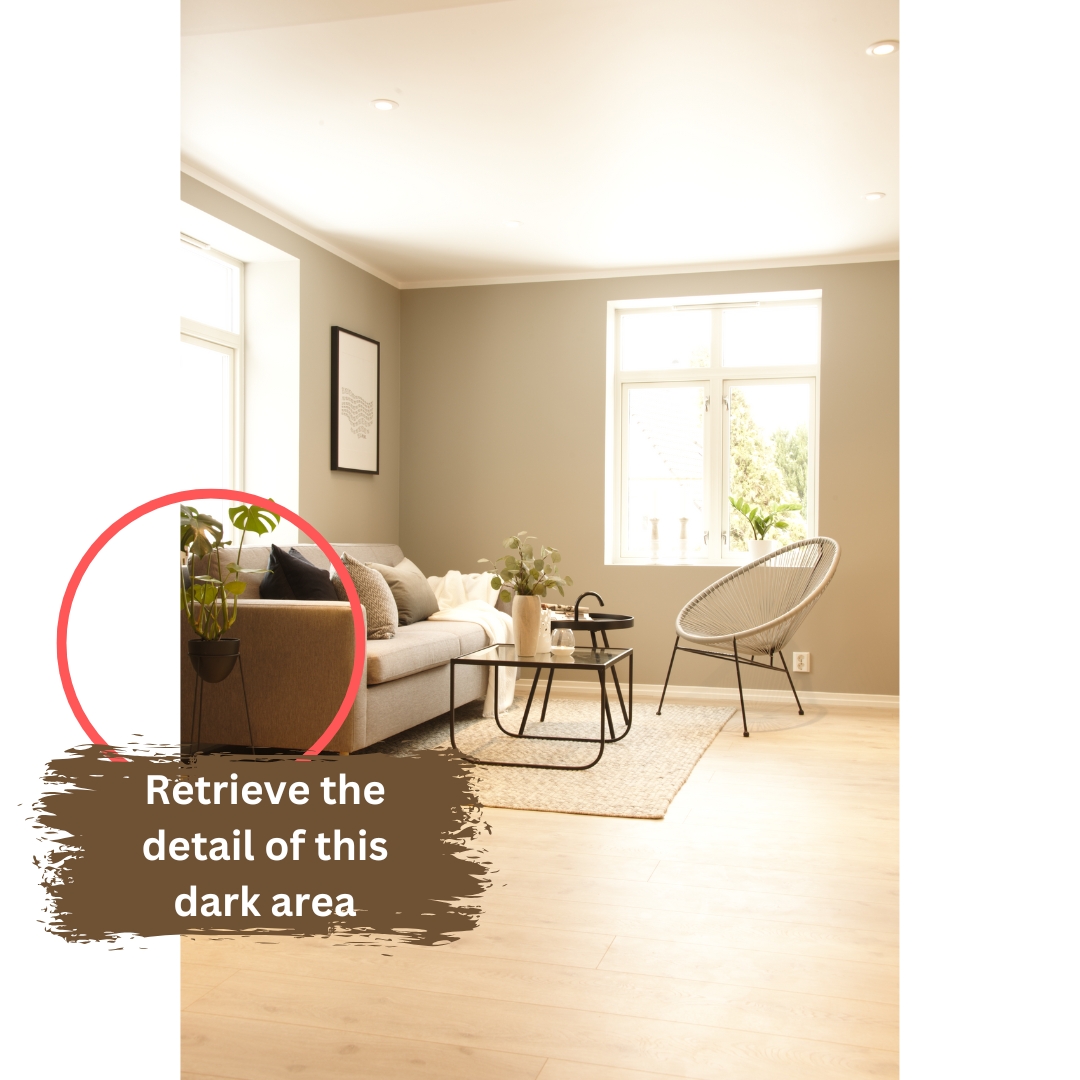
Bright exposures
By increasing the exposure value, details and objects in the dark area can be seen.
2.3/ Dark exposure
Dark exposures
Next, capture dark exposures for the window views and bright areas. Decrease the exposure value until the view in the window frame can be seen.
Finally, with all needed exposures captured, we can blend them together with a little editing to have a High Dynamic Range photo.
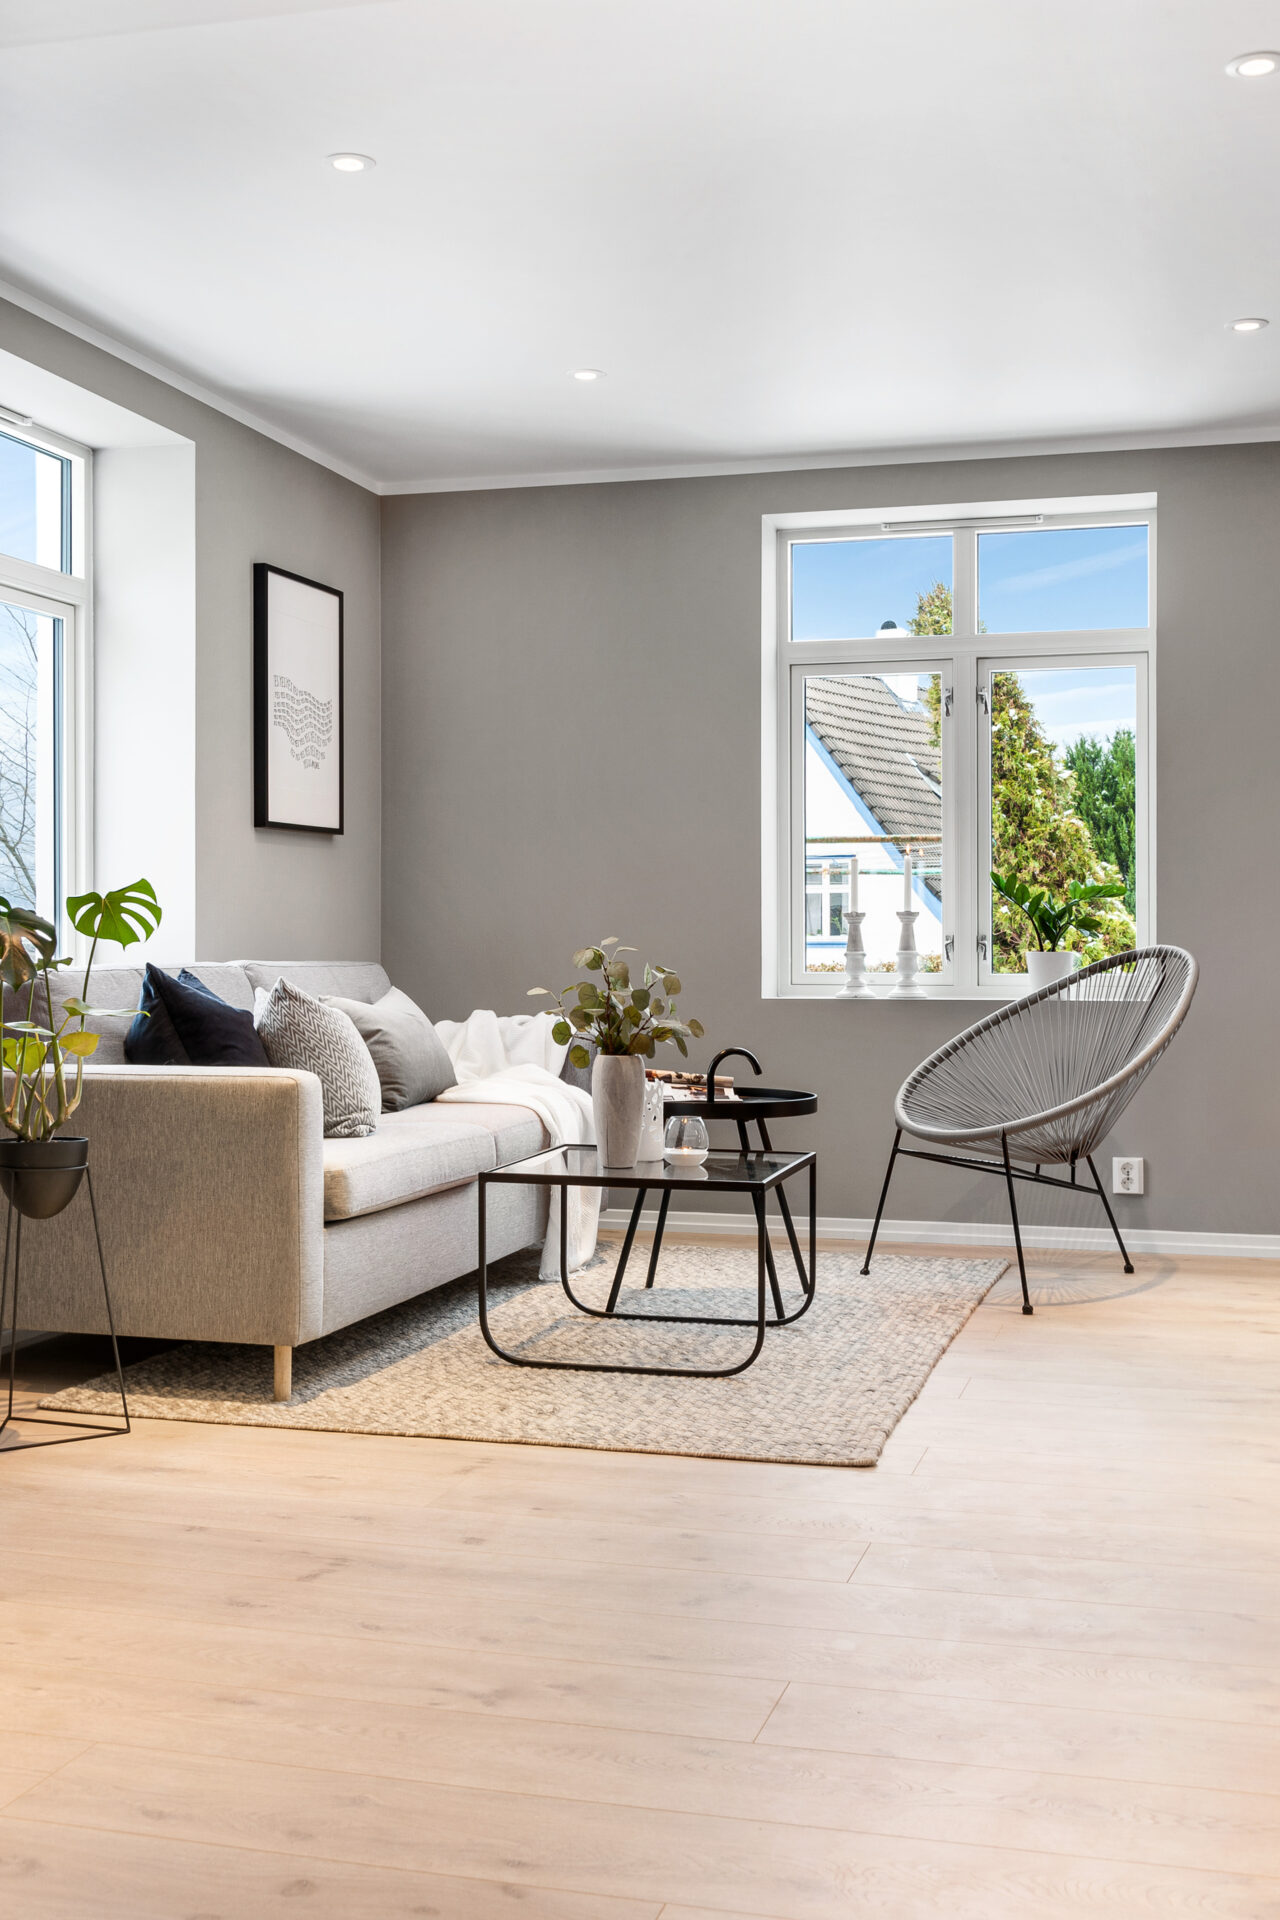
Final result
For detail of how setting your camera and blending the HDR image you can check out our blog: How to HDR photoshoot for real estate photography?
3/ Flash exposure
Beside the ambient exposures, you might also need a support from flash light in weak lighting condition. The flash exposure will bring the advantage in term of contrast, color, detail, and reflection control.
There are many ways to capture images with flash light but mainly there are 2 types: Direct flash and Bounce flash.
3.1/ Direct flash
Just like its name, direct flash exposure is captured with the flashlight direct toward the object or the frame that you are shooting. However, when shooting with the direct flash method, it’s usually require the flashlight to be in the frame. So it might require you to shoot multiple images for one frame, one with the flash toward the object; one with the flash out of the frame and other images with flash on other objects.
It would definitely take time to setup the shot, tripod and remote shutter required in this situation.
3.2/ Bounce flash
Pointing the flash toward a flat surface to have the lighting bounce from the surface to the object.
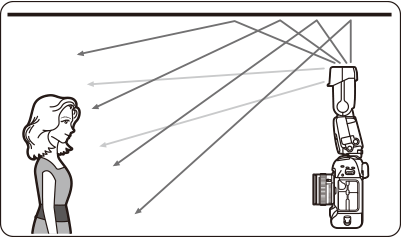
Bounce flash on human object. Credit here
This technique will provide a soft light, softer than the direct flash and highly effective for interior photos where the ceiling and walls are present.
However, the subject in the frame will have color cast if the bounce surface is colored. Also, one more thing to take note is the optimal distance from the flash to the bounce surface is 1 to 2 meters. If the distance exceeds 2 meters, it becomes harder for the light to reach the surface resulting in a weak bounce effect.
Flash is your savior in weak lighting conditions with many advantages such as: no color cast; deep contrast, making the subjects in the frame clear, showing the details near the light source and floor; removing noise, reflection, and bad shadow;…
But it come with a price that the light distribution is neither natural nor even with hard shadow. Not to mention the equipment, cost and the time to set up for the shot.
4/ Final bracket
With all the above information, we can suggest that an ideal bracket would contain 5-7 exposures:
- Ambient exposures: around 3 photos (Bright – Neutral – Dark)
- Direct flash: 1-2 photos
- Bounce flash: 1-2 photos
With a bracket that includes all of these exposures, it would be a relief when it comes to the editing step. You can check our blog for shooting and blending HDR
But learning to blend and edit real estate photos is not easy and takes time. To do the hard part and save your time, Ursin professional editing service is here for you. We provide a full range of solutions for the real estate photography business, from photo editing and floor plans to Virtual service and Illustration.
To learn more about our editing service please check out:


